Install Android 4.2 on Galaxy Nexus
— android — 2 min read
Android 4.2 is out for couple of days now. Yesterday morning I got OTA notification to upgrade it on my Galaxy Nexus GSM.
As excited I could be, I went for it, mobile rebooted to recovery mode. After a bit of cranking and all, boom! it failed
to update the system with some error message. I was like WTF! I rebooted the phone and I was anticipating that it
would have some how installed 4.2 Alas, no that was not the case. I tried OTA couple of times again but in vain.
So resorted to Google and found that OTA packages are available to download. Followed the article on slashgear and XDA forum.
All that failed I kept on getting error message assert failed : apply_patch_check ("/system/build.prop" something
like that.
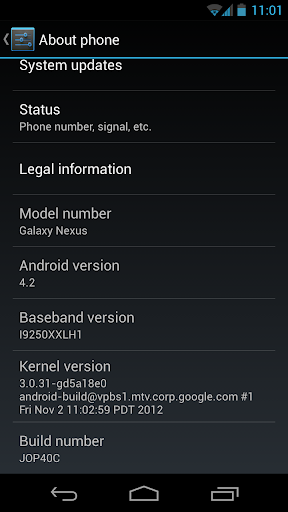
I tried something new this time, I decided to install factory image. List of factory images for nexus device is found
at Google Nexus site I went for 4.2 (JOP40C). Yes this is a 261+ MB in size.
In short, if you follow the steps given below you should be able to update your GNex to 4.2 without rooting it or OEM unlock. You don't even need to install CWM (clockworkmod) etc.
Prerequisite
I am using ubuntu 12.04 with android SDK installed. Which implies you would have adb and fastboot available.
You can check for that in platform-tools folder in your android sdk path. On Ubuntu I suppose you don't need to install
any sort of device drivers.
These steps may work on Windows as well, although with minor modification, you should have device drivers, adb and fastboot installed. Note that tz file has .bat file. So I assume if you have adb and fastboot in System Path. All you need to do is run flash-all.bat from cmd prompt.
Steps Involved
Please note that these steps would wipe out all the data from your phone. Consider taking a backup of data. This may even brick your phone.
- Unzip content of
takju-jop40c-factory-1a47c890.tgz - boot your phone to bootloader
- install bootloader
- reboot to bootloader
- flash takju image to phone
Essentially above steps are in flash-all.sh file. flash-all.sh did not work for me because for some reason fastboot fires
up for me only when I sudo.
In short you would fire following commands in the sequence below
1fastboot flash bootloader bootloader-maguro-primelc03.img2fastboot reboot-bootloader3fastboot flash radio radio-maguro-i9250xxlh1.img4fastboot reboot-bootloader5fastboot -w update image-takju-jop40c.zipI copied the content of takju-jop40c-factory-1a47c890.tgz to platform-tools folder before starting up with the above commands for ease of referencing the files.
log of my system below for reference.
1$ adb reboot-bootloader2
3 $ sudo ./fastboot flash bootloader bootloader-maguro-primelc03.img4 sending 'bootloader' (2308 KB)...5 OKAY [ 0.581s]6 writing 'bootloader'...7 OKAY [ 0.653s]8 finished. total time: 1.234s9
10 $ sudo ./fastboot reboot-bootloader11 rebooting into bootloader...12 OKAY [ 0.006s]13 finished. total time: 0.006s14
15 $ sudo ./fastboot flash radio radio-maguro-i9250xxlh1.img16 sending 'radio' (12288 KB)...17 OKAY [ 3.092s]18 writing 'radio'...19 OKAY [ 1.638s]20 finished. total time: 4.730s21
22 $ sudo ./fastboot reboot-bootloader23 rebooting into bootloader...24 OKAY [ 0.006s]25 finished. total time: 0.006s26
27
28 $ sudo ./fastboot -w update image-takju-jop40c.zip29 archive does not contain 'boot.sig'30 archive does not contain 'recovery.sig'31 archive does not contain 'system.sig'32 --------------------------------------------33 Bootloader Version...: PRIMELC0334 Baseband Version.....: I9250XXLH135 Serial Number........: 0149C7A50801700436 --------------------------------------------37 checking product...38 OKAY [ 0.007s]39 checking version-bootloader...40 OKAY [ 0.008s]41 checking version-baseband...42 OKAY [ 0.008s]43 sending 'boot' (4400 KB)...44 OKAY [ 1.108s]45 writing 'boot'...46 OKAY [ 0.398s]47 sending 'recovery' (4900 KB)...48 OKAY [ 1.248s]49 writing 'recovery'...50 OKAY [ 0.707s]51 sending 'system' (436723 KB)...52
53 OKAY [110.300s]54 writing 'system'...55 OKAY [ 42.772s]56 erasing 'userdata'...57 OKAY [ 1.122s]58 formatting 'userdata' partition...59 Creating filesystem with parameters:60 Size: 1453953433661 Block size: 409662 Blocks per group: 3276863 Inodes per group: 814464 Inode size: 25665 Journal blocks: 3276866 Label:67 Blocks: 354969168 Block groups: 10969 Reserved block group size: 87170 Created filesystem with 11/887696 inodes and 97200/3549691 blocks71 sending 'userdata' (137559 KB)...72 writing 'userdata'...73 OKAY [ 46.028s]74 erasing 'cache'...75 OKAY [ 0.044s]76 formatting 'cache' partition...77 Creating filesystem with parameters:78 Size: 45298483279 Block size: 409680 Blocks per group: 3276881 Inodes per group: 691282 Inode size: 25683 Journal blocks: 172884 Label:85 Blocks: 11059286 Block groups: 487 Reserved block group size: 3188 Created filesystem with 11/27648 inodes and 3566/110592 blocks89 sending 'cache' (8832 KB)...90 writing 'cache'...91 OKAY [ 4.060s]92 rebooting...93
94 finished. total time: 207.843sAfter completion phone would reboot automatically. Please leave a comment if you this works for you or not.